Shrink Images for Accessibility in SwiftUI
Leveraging Dynamic Type to improve your UX
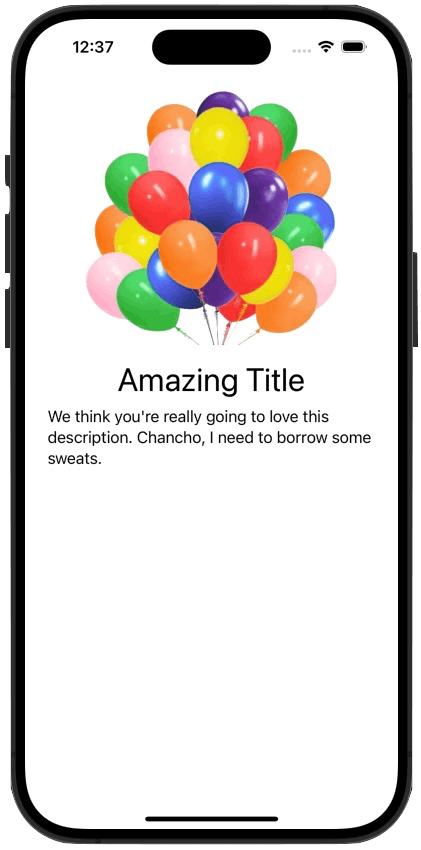
Have you ever built a screen layout where there's a big Image above a couple of Text views? There's a good chance that you have because this layout pattern is commonly used in places like app intro screens and onboarding screens. Something kind of like this:

There are often more elements on the screen than what my screenshot shows, but I want to keep this demo simple. 😊
The most recent time I was building screens like that, I was testing how the layout responded to Dynamic Type (i.e. bigger/smaller device font size setting). And it was in that exact moment when I realized that the most important part of my layout was the copy being shown in the Text views and not the Image. Because the images-in my specific situation-did not provide any informational value to the user. And I really wanted the user to be able to focus on reading the text without having the image get in the way when using larger Dynamic Type sizes. With this realization, my brain immediately thought, "OK, what I need to do is leverage Dynamic Type to shrink the height of the image as the Dynamic Type size grows." I had actually never thought about doing this before, and I also don't think it's a documented approach in the HIG or anything, but it seemed to make sense in my situation at the time and I already knew the exact tools to use in SwiftUI to make it a reality. So I decided to go ahead with it. And that's the approach I wanted to explore in today's article!
In order to accomplish this, we only need to use 3 things:
1️⃣. The awesome Environment variable called dynamicTypeSize to access the user's current font size;
@Environment(\.dynamicTypeSize) private var currentDynamicTypeSize
(I love how easily we can access Dynamic Type information! 😃)
2️⃣. A @State property to hold a calculated image height-based on the currentDynamicTypeSize;
@State private var calculatedImageHeight: Double = .zero // arbitrary initial value
3️⃣. Somewhere to switch on the currentDynamicTypeSize, like the .onChange modifier or the .onAppear modifier (I chose .onChange, but you do you), where we can calculate and set the calculatedImageHeight.
.onChange(of: currentDynamicTypeSize, initial: true, { _, newValue in
    switch newValue {
        ...
        // case .small, .medium, .large - etc.
        // Calculate and set the image height here
    }
})
And with those 3 key things, all we have left to do is calculate a height based on the different Dynamic Type sizes and then use it on the Image! To do that, we can let Xcode auto-fill in all the cases in the switch statement so we can see all the possible Dynamic Type sizes, and then do a quick little multiplication arithmetic to come up with a value for calculatedImageHeight.
The end goal is to have the calculatedImageHeight be a certain percentage of a predetermined base image height. Let's choose 268 for this demo. (e.g. if we want the calculated height to be 75% of 268, that's 0.75 * 268) So, we can choose the Dynamic Type sizes that fit our particular situation, decide on a "scale factor" percentage for each case, then multiply baseImageHeight by the scaleFactor—and that's our calculatedImageHeight! Here's an example of how that could look:
.onChange(of: currentDynamicTypeSize, initial: true, { _, newValue in
    let scaleFactor: Double

    switch newValue {
    case .xSmall, .small, .medium, .large:
        scaleFactor = 1.0
    case .xLarge:
        scaleFactor = 0.9
    case .xxLarge:
        scaleFactor = 0.75
    case .xxxLarge:
        scaleFactor = 0.55
    default:
        scaleFactor = 0.3
    }

    let baseImageHeight = 268.0
    calculatedImageHeight = baseImageHeight * scaleFactor
})
baseImageHeight into a constant up near the @State variable, if you wanted to. Some people might like having it near the calculation, while others might like it up top near the related calculatedImageHeight property. I'm not picking a side here. This is nice for the demo, so let's not worry about it, k?Notice, as the Dynamic Type size gets bigger, we use smaller percentages: 90%, down to 75%, down to 55%, and then to 30%. For this demo, I decided to cap the scaling off after .xxxLarge by putting 30% into the default case. So in the end, any Dynamic Type size smaller than .xLarge uses 100% of the base image height; anything bigger than .xxxLarge uses 30% of the base image height; and a few other percentages for the cases in between.
Now we're ready to apply calculatedImageHeight to the Image and see what happens!
Image(.balloons)
    .resizable()
    .scaledToFit()
    .frame(maxHeight: calculatedImageHeight) // 🎉 ✅
And hey, it works! Here's the result as a GIF:

scaleFactor percentages to see what feels best to you. These example percentages are for demo purposes.I understand that there's a chance another approach exists to achieve this exact same thing. 😄 I do think, though, that this approach is a fun way to leverage Dynamic Type to achieve a specific-and hopefully improved-user experience.
That's all! See ya later, rollerblader!
